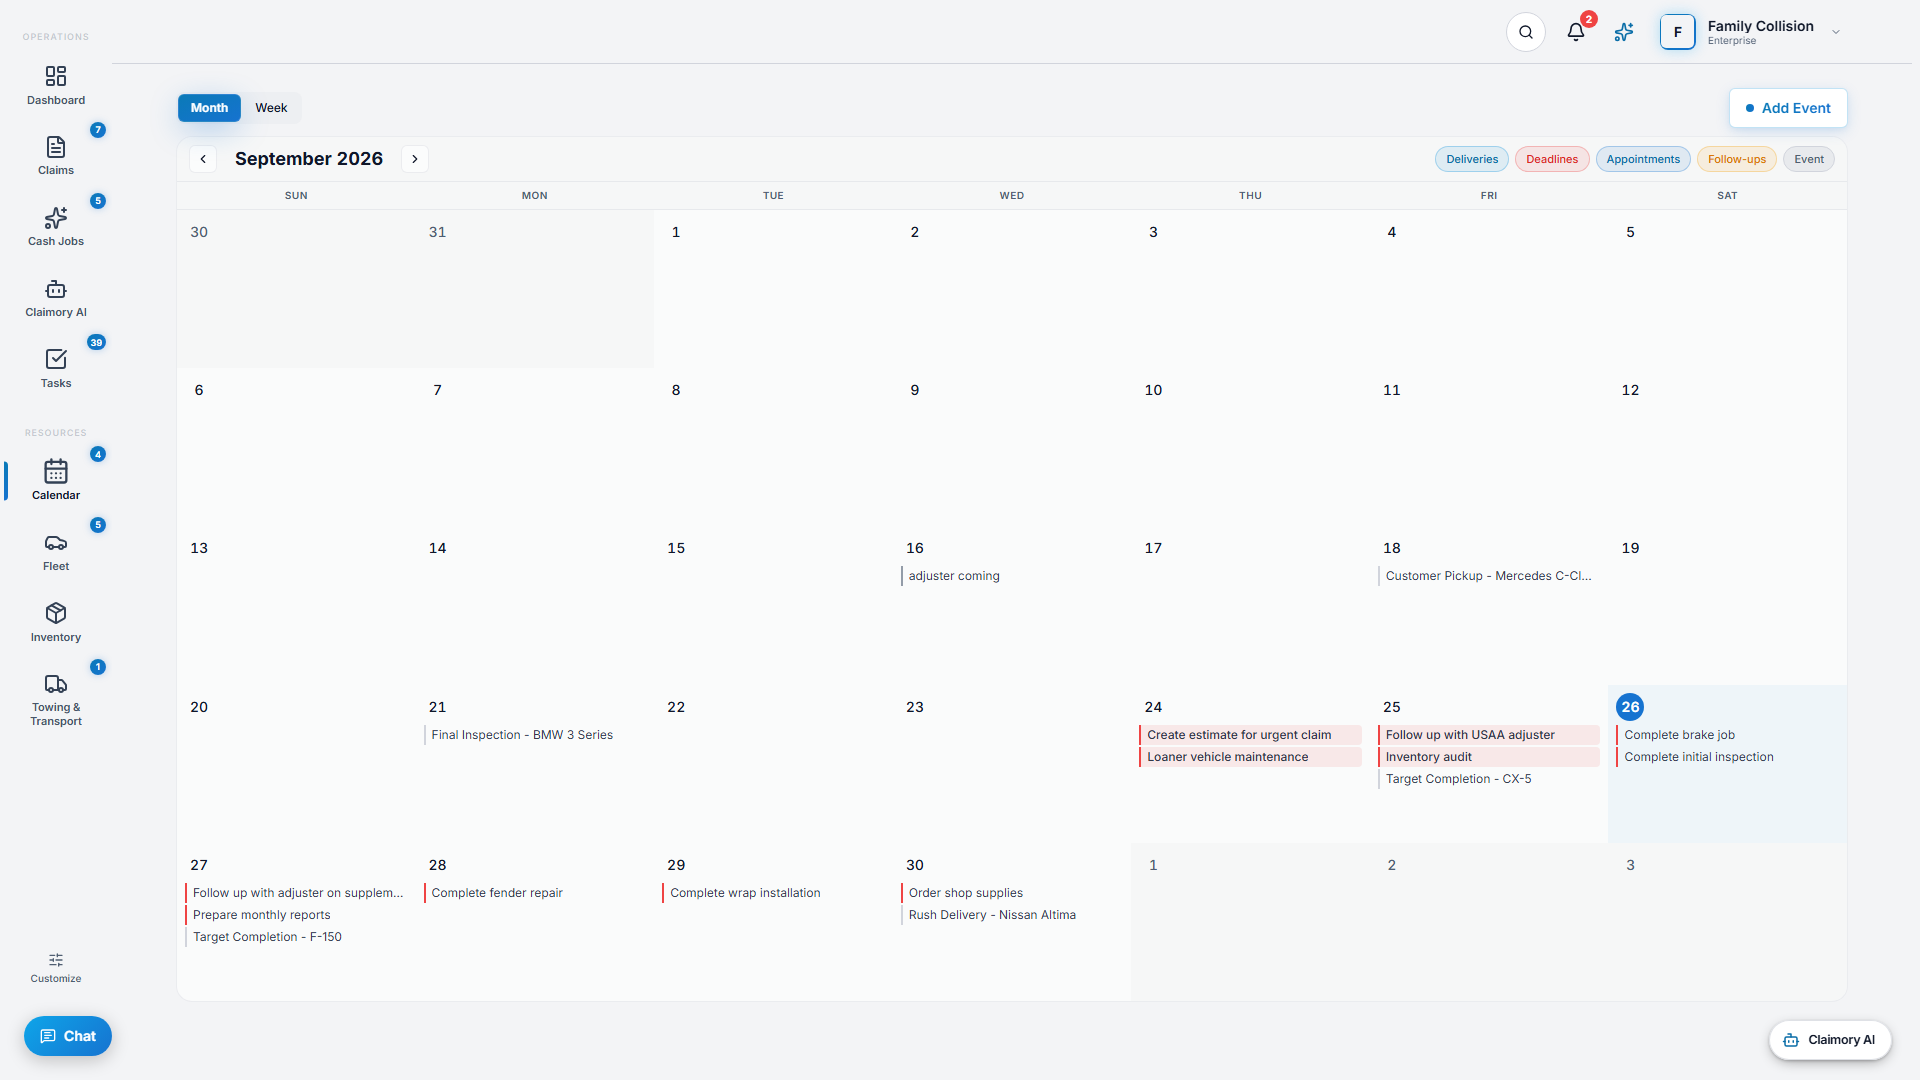
The calendar is the shop's single schedule. Much of it fills in automatically from your claims, so promised dates and task deadlines appear without anyone entering them twice.
app.claimory.io/calendar
Step 1
1
Open the calendar
Click Calendar in the left rail. Switch between Month and Week, and use Today to jump back to the current day.
app.claimory.io/calendar
2
Step 2
2
Read the colors
Events are color-coded by type: deliveries (promised dates), deadlines (task due dates), appointments, and follow-ups, plus any manual entries you add.
Step 3
3
Add an event
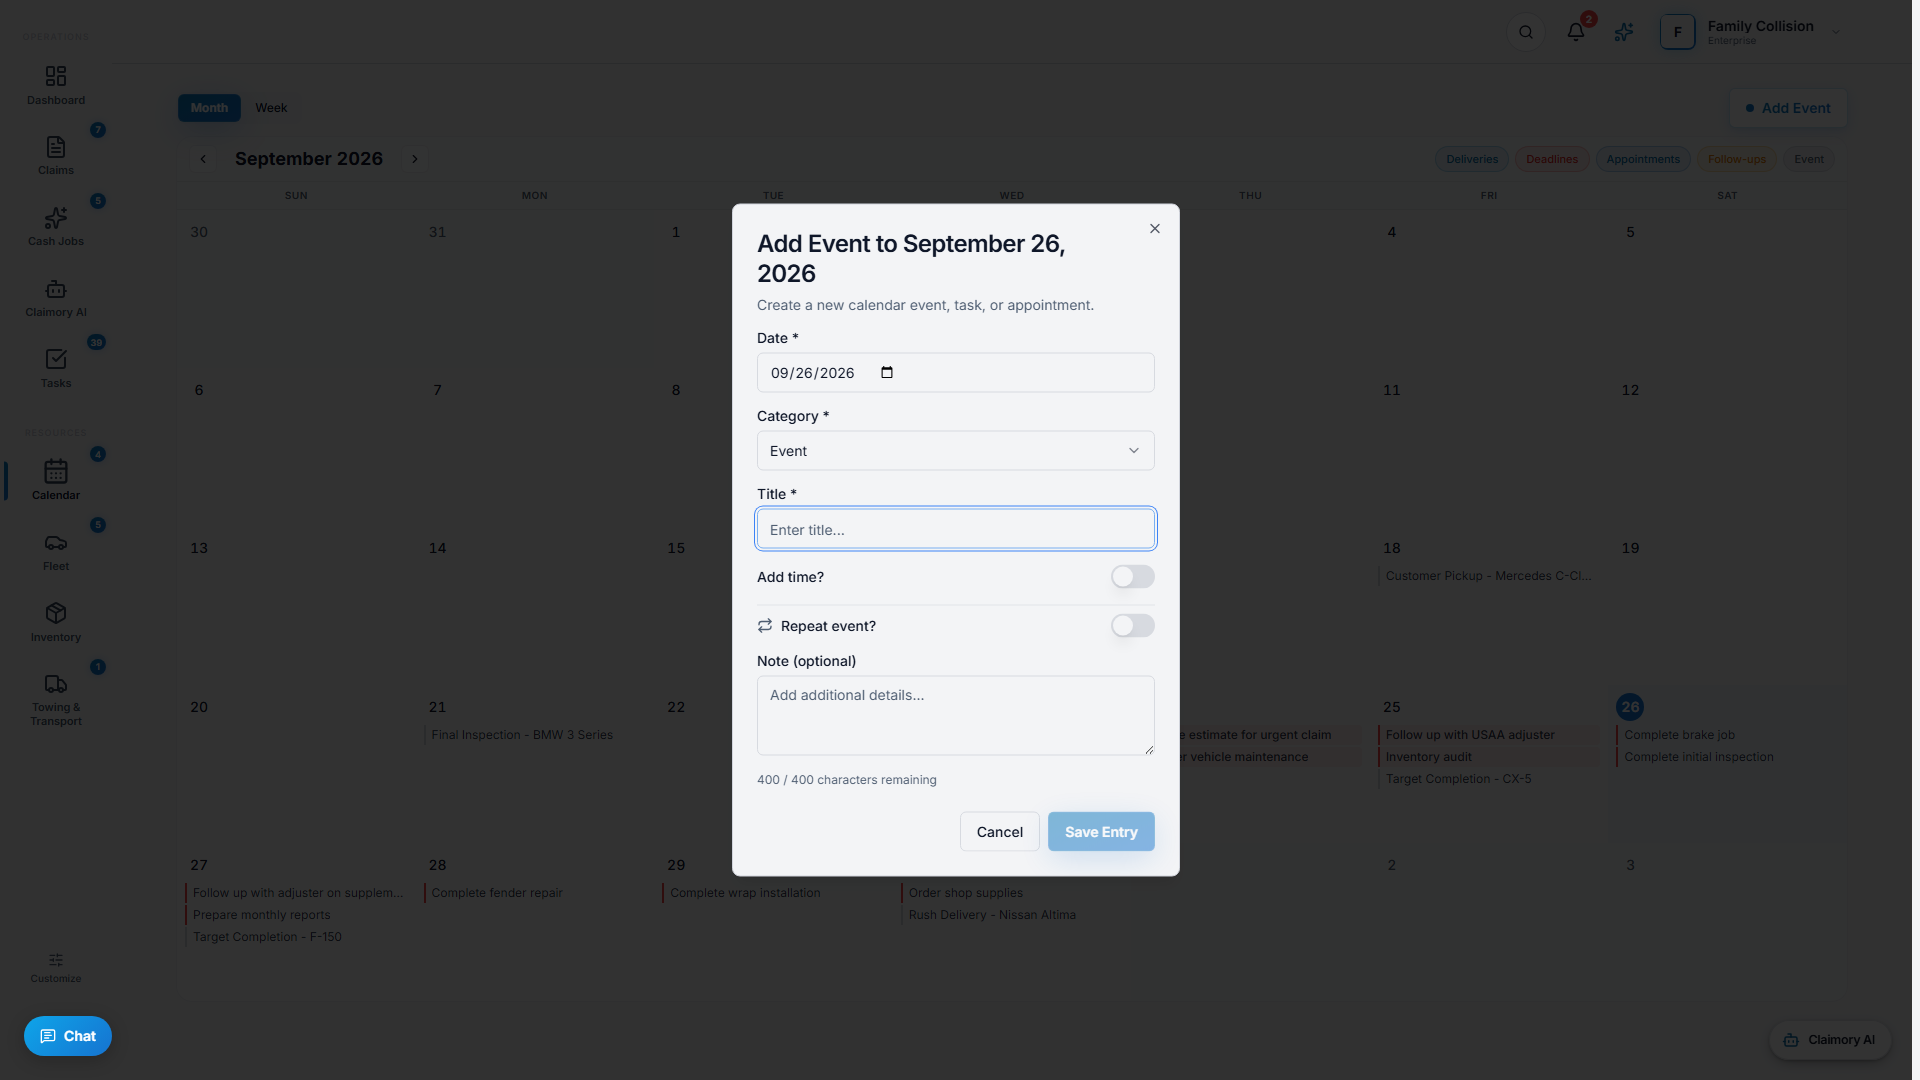
Press Add Event, or click an empty day. Fill in the details and save. Click a busy day to see everything scheduled on it.
app.claimory.io/calendar
Step 4
4
Let claims fill the calendar
Promised dates and task deadlines flow onto the calendar automatically from your claims and tasks, so the schedule stays accurate without double entry.
Pro tip
Keyboard shortcuts speed things up: arrows move by day or week, T jumps to today, and N starts a new event.