
Loaners and Rentals
If you put customers in loaner or rental vehicles, this is where you track the fleet, who has what, and the signed agreement. Available on Professional and up.
- Step 11
Open Loaners
Click Loaners in the left rail. You see your fleet and active rentals, with days-out and overdue flags so nothing slips.
app.claimory.io/loaners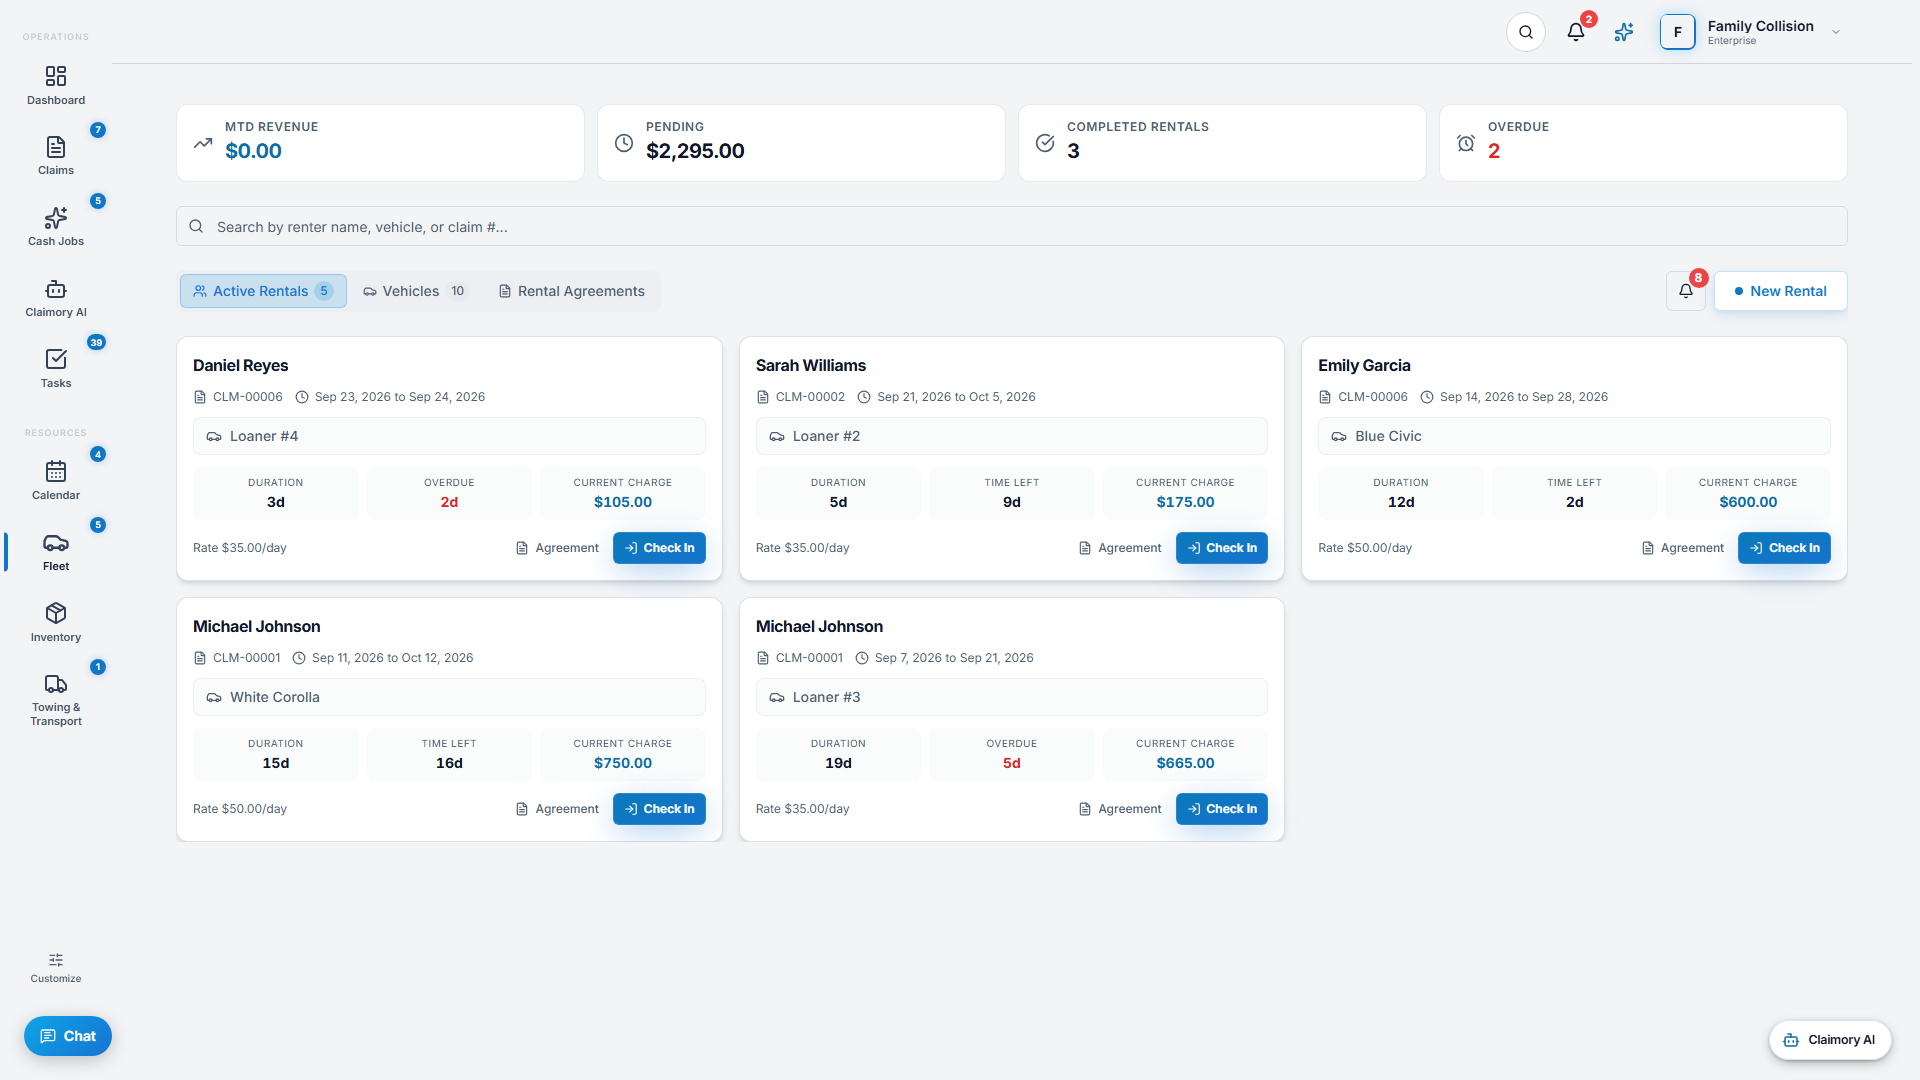
- Step 22
Add fleet vehicles
Click New Rental, then Fleet Vehicle, to put a loaner or rental car on the books. Claimory takes the vehicle, its registration and its service schedule in three steps, and clicking a fleet card later reopens it for edits.
app.claimory.io/loaners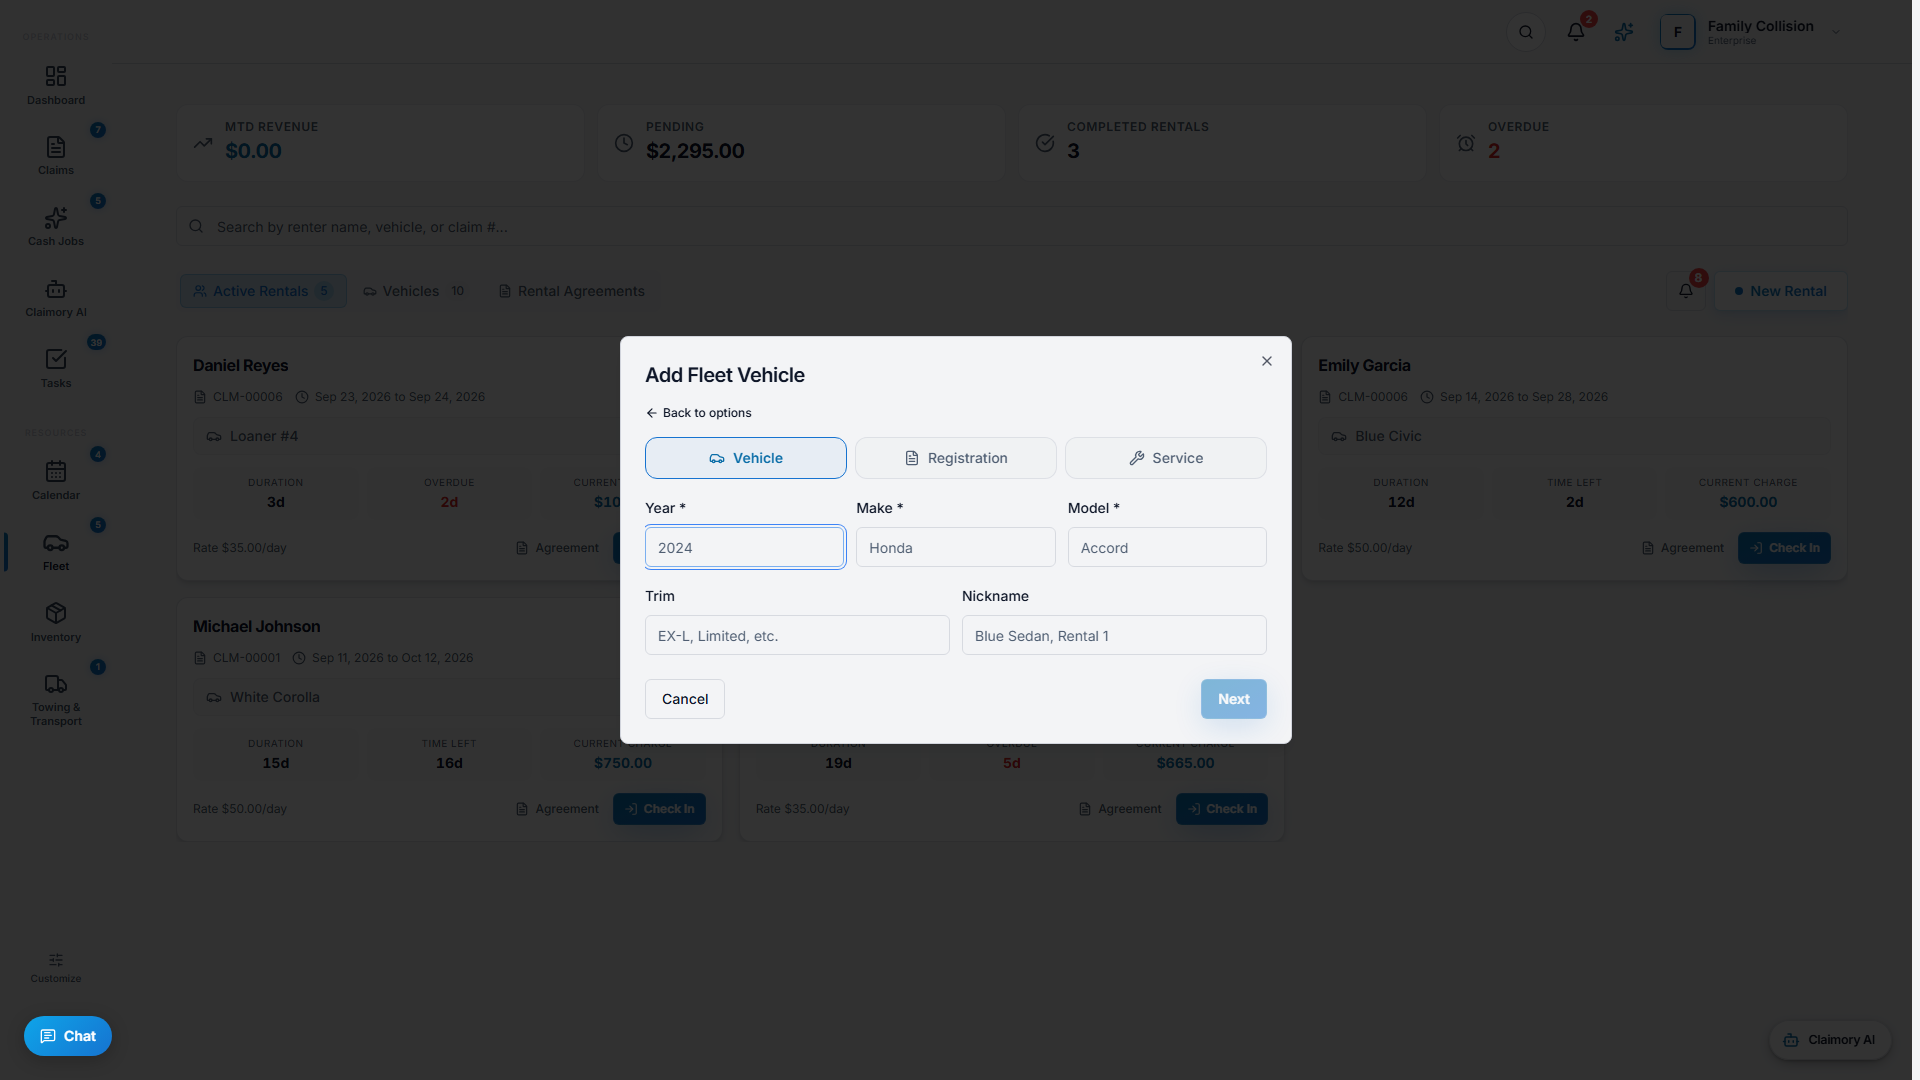
- Step 33
Start a rental
Use the rental wizard to put a customer in a vehicle. You can check in, reopen, or edit a rental as the situation changes.
app.claimory.io/loaners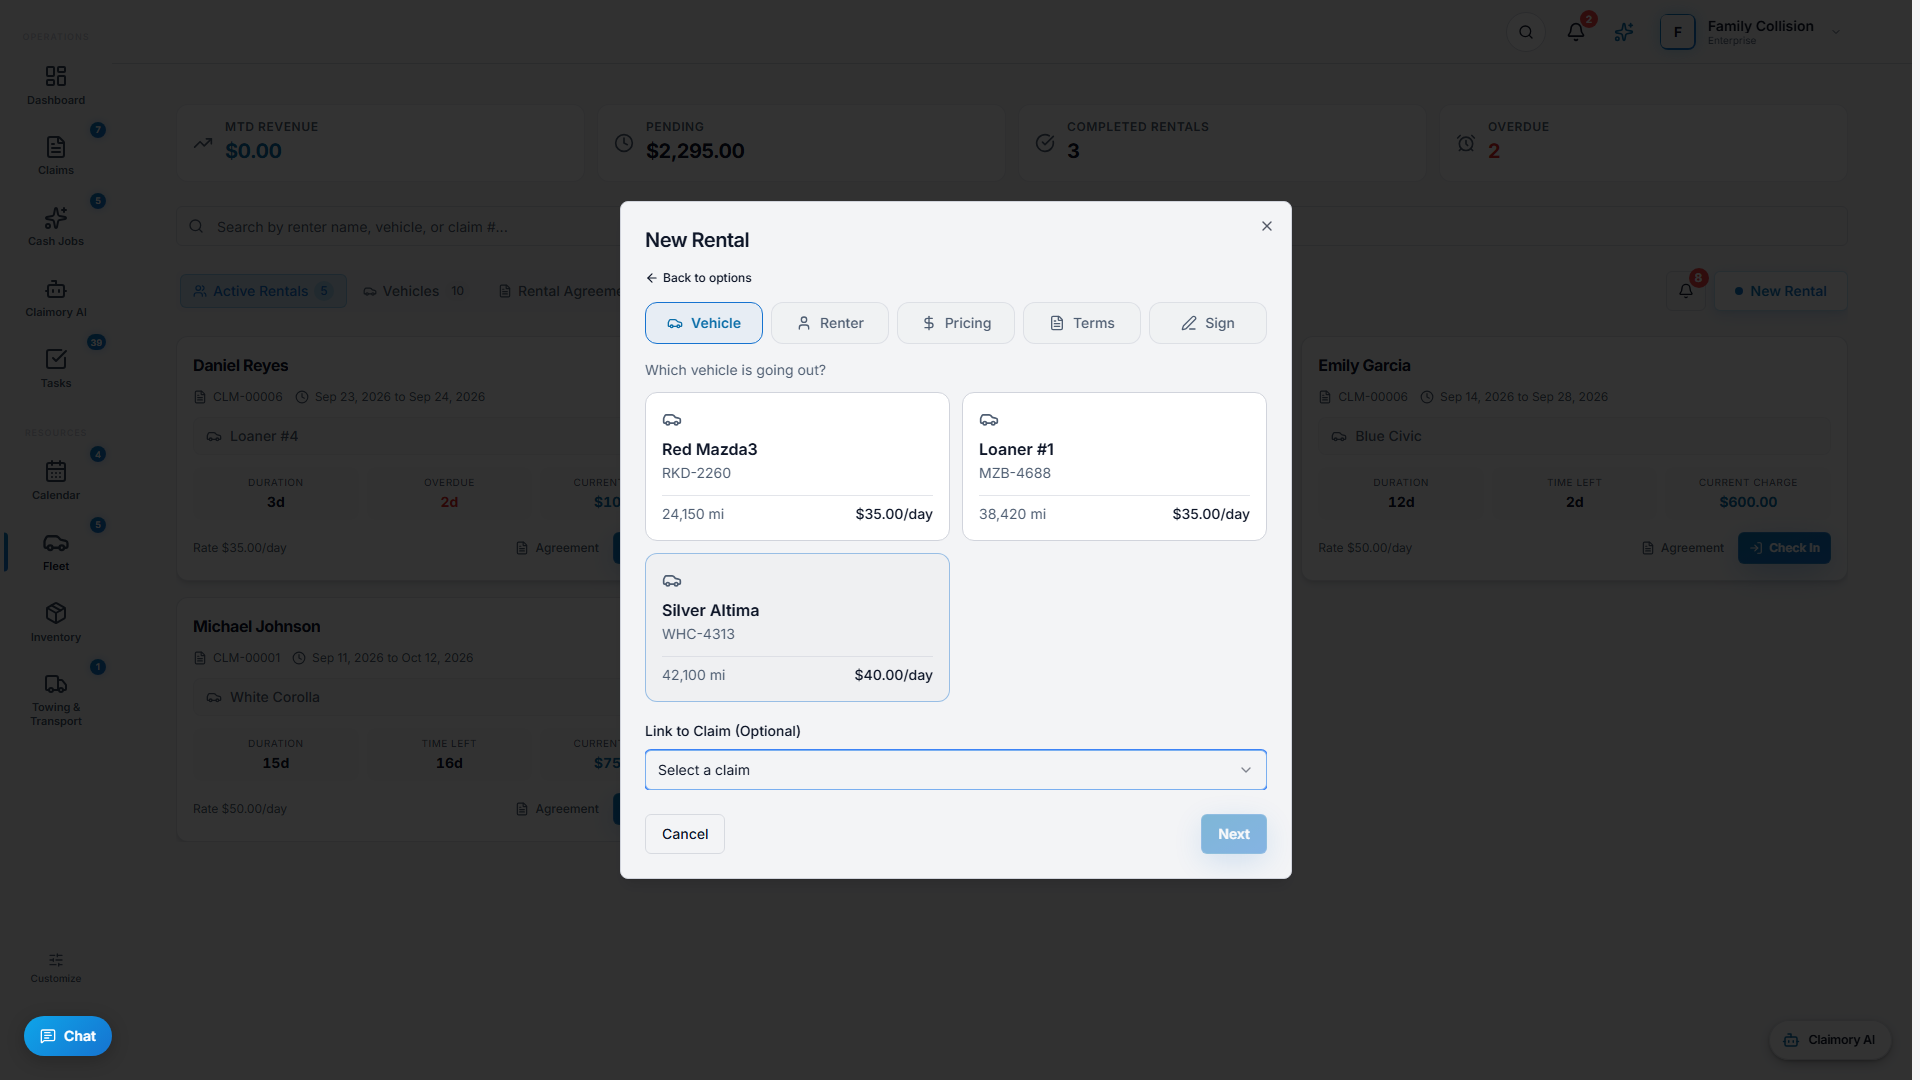
- Step 44
Get the agreement signed
Generate a rental agreement and have the customer e-sign it on a secure link. Fleet alerts flag overdue returns so you stay on top of exposure.


Common questions
Related tutorials
Ready to run your shop on Claimory?
Start a free 14-day trial. No credit card. The full Professional feature set, and an office manager onboarded in about 30 minutes.
No credit card. Works with CCC ONE and Mitchell.